
Amazon Location Service is a fully managed service that makes it easy to add location functionality to your applications. With Amazon Location Service, you can build applications that provide maps and points of interest, convert street addresses into geographic coordinates, calculate routes, track resources, and trigger actions based on location. Amazon Location Service uses high-quality geospatial data to provide maps, places, routes, trackers, and geofences.
Amazon Location Service general availability was announced in June 2021, the service has a lot of use cases and in this blogpost we will focus on tracking and geofencing of a particular area. Let me just say that this article initial purpose was built onto a particular use case: I'd would love to be notified when my dog runs away from home to visit his dog friends. The internet is full of advanced tracking collars so I stayed with the AWS infrastructure of that idea and the solution I came up with could benefit other use cases like sending notification to users when they exit your shop.
Here are some topics covered in this article:
- overview of the AWS infrastructure we are going to built to send text notification to users when they enter/exit a particular area;
- what is AWS CDK and how to start a project with a simple boilerplate;
- geofencing and tracking with Amazon Location Service, well there is also a custom resource with CDK;
- sending SMS with Amazon SNS.
Solution overview

The AWS Architecture is fairly simple, there are two main component:
- Tracking and geofencing: used to track users, when they enter/exit a specific geofence it triggers the notification component;
- Notification: when the Amazon EventBridge rule is triggered it fires an AWS Lambda function which publishes a message into an Amazon SNS Topic. Lets start.
Creating a new CDK Project
AWS Cloud Development Kit (AWS CDK) is an open-source software development framework to define cloud resources using familiar programming languages.
I've created a CDK boilerplate for my projects, so let's start by cloning the project: https://github.com/Depaa/cdk-boilerplate. This project will relieve you from the initial set up of a CDK project, it's written in Typescript and has the following component:
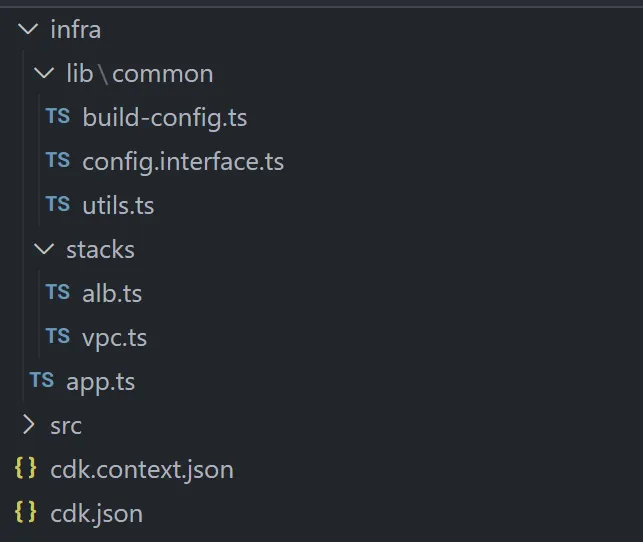
Under infra/lib/common you can find the config and the interface for better typing, it simply will take the variables you specify in cdk.json context and it will create an useful structure. Within infra/app.ts file we declare our stacks in infra/stacks folder. Alright we are all set up, let's clear vpc and alb stacks so we can create our own stacks.
Note: if it's your first time with CDK you must bootstrap your AWS account, it will create all the resources CDK needs to deploy your project, like roles, policy, s3 bucket. Run npm run bootstrap and it should do the trick if your user has enough permission to create those resources.
Tracking and geofencing
To track users we need to create a Tracker and link it to the Geofence collection. Usually users will select the geofence by themselves, in this case I wanted to configure a geofence right from the start so we do not need to do anything else other than run "deploy"..… Well there are no Geofence constructs in CDK so we need to create a custom lambda and write the code to create, update and delete the Geofence.
Alright let's start creating our first geofence collections which will have our geofence, the tracker to track users and then link them together.
  this.geofenceCollection = new CfnGeofenceCollection(this, name, {
    collectionName: `${name}`,
    description: 'Geofence collection',
  });
  this.tracker = new CfnTracker(this, name, {
    trackerName: `${name}`,
    description: 'Geofence collection',
    positionFiltering: 'AccuracyBased',
  });
  new CfnTrackerConsumer(this, name, {
    consumerArn: this.geofenceCollection.attrArn,
    trackerName: this.tracker.trackerName
  });
Perfect, the only thing we need to explain here is the object positionFiltering because it can have different values based on the specific use case:
- Accuracy-based
For each device, location updates are only processed if they have moved more than their accuracy. For example, if two consecutive updates have an accuracy of 5m and 10m respectively, then the second update is only processed if it has moved more than 15m. Otherwise, the location update is neither evaluated against linked geofence collections, nor stored. This helps control costs by reducing the number of geofence evaluations and device positions to retrieve. Accuracy-based filtering can also reduce the jitter effect when displaying device trajectory on a map.
- Distance-based
If you don't plan to send accuracy with each location update, you can use distance-based filtering to use an accuracy of 15 m for each updated. In this case, if the device has moved less than 30 m (98.4 ft), location updates are ignored. Location updates within this distance are neither evaluated against linked geofence collections, nor stored. This helps control costs by reducing the number of geofence evaluations and device positions to retrieve. Distance-based filtering can also reduce the jitter effect when displaying device trajectory on a map.
- Time-based
Location updates are evaluated against linked geofence collections, but not every location update is stored. If your update frequency is more often than 30 seconds, only one update per 30 seconds is stored for each unique device ID.
For testing purposes I'll omit the object accuracy entirely when sending device updates so it will not filter out any.
Now let's create the geofence within the geofence collections resource. To do so we will create a lambda which creates a Geofence, but if you want to save all the troubles of creating a custom resource you can simply paste this aws-cli command at the end of the deploy
aws location put-geofence --collection-name '${collection_name}' --geofence-id 'geofence' --geometry 'Polygon=[ [ [12.49214172363281, 41.889379460094084], [12.492672801017761, 41.889414402879474], [12.49292492866516, 41.88946332274692], [12.49312475323677, 41.889505254032066], [12.493339329957962, 41.88958612143279], [12.493488192558289, 41.889666988731186], [12.493611574172974, 41.88990260151071], [12.493777871131897, 41.890166167318995], [12.493767142295837, 41.890481646174834], [12.493144869804382, 41.89080111684615], [12.492769360542297, 41.89093689139765], [12.492152452468872, 41.89100877192572], [12.491873502731323, 41.89097283167178], [12.491363883018494, 41.89090494447032], [12.491052746772766, 41.89060144786383], [12.49096155166626, 41.89025402234678], [12.491165399551392, 41.88965101495195], [12.49214172363281, 41.889379460094084] ] ]' --region eu-central-1 --profile aws_profile
What we need for a custom resource is:
- lambda function
  this.lambdaFunction = new Function(this, name, {
    functionName: `${name}`,
    runtime: Runtime.NODEJS_16_X,
    timeout: Duration.seconds(30),
    code: Code.fromAsset(path.join(__dirname, '../lambdas/create-geofence')),
    handler: 'index.handler',
    environment: {
      REGION: region,
      ACCOUNT_ID: account,
      COLLECTION_NAME: this.geofenceCollection.collectionName,
      GEOFENCE_ID: name,
    }
  });
- permissions to invoke Amazon Location APIs
  const putGeofencePermission = new PolicyStatement({
    effect: Effect.ALLOW,
    actions: [
      'geo:putGeofence',
      'geo:BatchDeleteGeofence'
    ],
    resources: [
      `arn:aws:geo:${region}:${account}:geofence-collection/${this.geofenceCollection.collectionName}`
    ]
  });
  this.lambdaFunction.addToRolePolicy(putGeofencePermission);
- custom resource to create the geofence
  const customResourceProvider = new Provider(this, `${name}-provider`, {
    onEventHandler: this.lambdaFunction,
  });
  new CustomResource(this, name, {
    serviceToken: customResourceProvider.serviceToken,
  });
- the actual code of the lambda function, let's break it though:
  const LocationService = require('aws-sdk/clients/location');
  const response = require('cfn-response');
  const fs = require('fs/promises');
  const locationService = new LocationService();
those are libraries we need to create the location client, read geojson file and then we need cfn-response to parse the response to CloudFormation.
const geojson = JSON.parse(await fs.readFile('./polygon.geojson', 'utf8'));
this will convert the .geojson file to json so we can use its objects, you can create a .geojson file easily by going to this website https://geojson.io/; just remember a geofence polygon must consist of between 4 and 1,000 vertices.
  const params = {
    CollectionName: process.env.COLLECTION_NAME,
    GeofenceId: process.env.GEOFENCE_ID,
    Geometry: {
      Polygon: geojson.features[0].geometry.coordinates,
    },
  };
those are the parameters, as you can see we took the environment variables from the CDK lambda creation
  const result = await locationService.putGeofence(params).promise();
  response.send(event, context, 'SUCCESS', {
    GeofenceId: result.GeofenceId,
  });
up here we have the creation of geofence
  const result = await locationService
    .batchDeleteGeofence({
      CollectionName: params.CollectionName,
      GeofenceIds: [params.GeofenceId],
    })
    .promise();
  response.send(event, context, 'SUCCESS', {});
while here the resource deletion code.
Note: you can find the link to the code at the bottom of the blogpost.
Notification
Notification stack is pretty standard, we need to create the following resources:
- SNS topic to send notifications to it's subscribers, hence we also need to subscribe a phone number (if you do not intend to pay any money you could also use an email)
  this.snsTopic = new Topic(this, name, {
    topicName: `${name}`,
  });
  new Subscription(this, name, {
    topic: this.snsTopic,
    ...endpoint
  })
you can find the endpoints within the file cdk.json which will contains the environment variables like this
  "stacks": {
    "notification": {
        "endpoints": [
          {"endpoint": "emailAddress", "protocol": "email"},
          {"endpoint": "phoneNumberWithPrefix" , "protocol": "sms"}
        ]
    }
  }
you just need to replace emailAddress and phoneNumberWithPrefix with your own.
- Lambda function to publish a message to the SNS topic
  this.lambdaFunction = new Function(this, name, {
    functionName: `${name}`,
    runtime: Runtime.NODEJS_16_X,
    timeout: Duration.seconds(30),
    code: Code.fromAsset(path.join(__dirname, '../../src/lambdas/trigger-enter-event')),
    handler: 'index.handler',
    environment: {
      REGION: region,
      ACCOUNT_ID: account,
      TOPIC_NAME: this.snsTopic.topicName
    }
  });
- Eventbridge rule triggered by geofences events of enter and exit which as a target will have the Lambda function
  new Rule(this, name, {
    ruleName: `${name}`,
    description: 'Rule triggered when enter event',
    eventPattern: {
      source: ['aws.geo'],
      detailType: ['Location Geofence Event'],
      detail: {
        EventType: ['ENTER', 'EXIT']
      }
    },
    targets: [
      new LambdaFunction(this.lambdaFunction)
    ]
  });
and of course we need the lambda code
  const eventType = event.detail.EventType;
  const params = {
    Message: JSON.stringify({
      sms: `Enjoy your ${eventType} event`,
      email: `Enjoy your ${eventType} event`,
      default: `Enjoy your ${eventType} event`,
    }),
    MessageAttributes: {
      'AWS.SNS.SMS.SenderID': { DataType: 'String', StringValue: 'BlogTest' },
      'AWS.SNS.SMS.SMSType': { DataType: 'String', StringValue: 'Transactional' },
    },
    Subject: eventType === 'ENTER' ? 'Welcome to my blog' : 'See you soon',
    TopicArn: `arn:aws:sns:${process.env.REGION}:${process.env.ACCOUNT_ID}:${process.env.TOPIC_NAME}`,
    MessageStructure: 'json',
  };
  const response = await sns.publish(params).promise();
as you can see I've set AWS.SNS.SMS.SenderID and AWS.SNS.SMS.SMSType. The code will send a different message based on the EventType.
Note: several major markets (including Canada, China, and the United States) don't support sender ID, you may need to have your sender IDs pre-approved by a regulatory agency before you can use them.
Deploy
Before deploying you must change the variables in cdk.json with your own parameters, then if you are using different AWS profiles you should add — profile your_aws_profile right at then end of the deploy script. Perfect you can now run the deploy command and wait until all the resources have been deployed.
Integration test
Finally we can test our infrastructure, I've wrote a simple NodeJS script just for testing purposes. In the test/ folder you will see the script send-locations.js and a file named polygon.json which contains two positions: one within our geofence while the other is outside of it.
The script will send 100 positions, one every second, and after 9 consecutive outside position it will send one inside position to trigger our asynchronous infrastructure and send notifications.
Let's run the command "npm run test" and you will see one position being sent every second. When the script fires the "inside" position we will receive an email and/or text message to notify us about enter and then exit events like the image below.

Conclusion
In this blogpost we learned how to track devices and send notifications when those devices enter or exit our geofence and before this we learned how to set up a cdk project and also create a lambda function to create and delete custom resources so that was a pretty interesting.
You can find the project here https://github.com/Depaa/geofencing-tracking-amazon-location-service 😉
Thank you so much for reading! 🙏 I will keep posting different AWS architecture from time to time so follow me on LinkedIn 👉 https://www.linkedin.com/in/matteo-depascale/.